

Get Started with Your Lift
Learn to raise, lower, and stop your lift with the wireless remote, control switches, or Atlantis Boater. Using the app? Start by connecting your account.
01 · Get the app
Download and sign in
Install Atlantis Boater on your phone. Open the app and choose Sign In with your Atlantis account. New here? Choose Sign Up, fill in the form, and choose Create Account. Open the verification email, select Verify Email, and return to the app to sign in.
Keep your phone connected to the internet for sign-in and account setup. Use your own account, including when a lift is shared with you.
02 · Connect your lift
Find your lift in the app
Stand near the lift with its power switched on, turn on Bluetooth, and allow the nearby-device or location permission your phone requests. A controller with no power cannot be found. Then follow the option that matches your access.
Your lift already appears
Select the lift, check its name and serial number against the controller label, then choose Open Lift Control.
Someone shared a lift with you
Sign in with the email address that received the invitation. Accept it under Pending Invitations, then select the shared lift and choose Open Lift Control. Keep your phone connected to Wi-Fi or cellular internet: shared access needs an online access check even when you control the lift over Bluetooth. If the invitation is missing, ask the owner to check the email address they used.
Your marina provides the lift
Use the account and assignment arranged with marina staff. Select the assigned lift when it appears. Contact the marina if access is missing or expired. Do not claim or reset a marina-managed lift.
Add your own newly installed lift
- Choose Add a Lift and select the nearby controller whose serial number matches its label.
- Fill in House / Property Name, Friendly Lift Name, and Installation Address.
- To connect the lift to the internet, switch on Enable WiFi, then pick your 2.4 GHz network and type its password. The lift cannot join a 5 GHz network, so choose the 2.4 GHz one if your router lists both. You may leave it off and use Bluetooth only, but read the warning below the steps first.
- Choose Add Lift. Keep your phone nearby and the screen open until the app confirms the lift was added to your account.
Example screens from Atlantis Boater. Names, device details, and settings are samples.
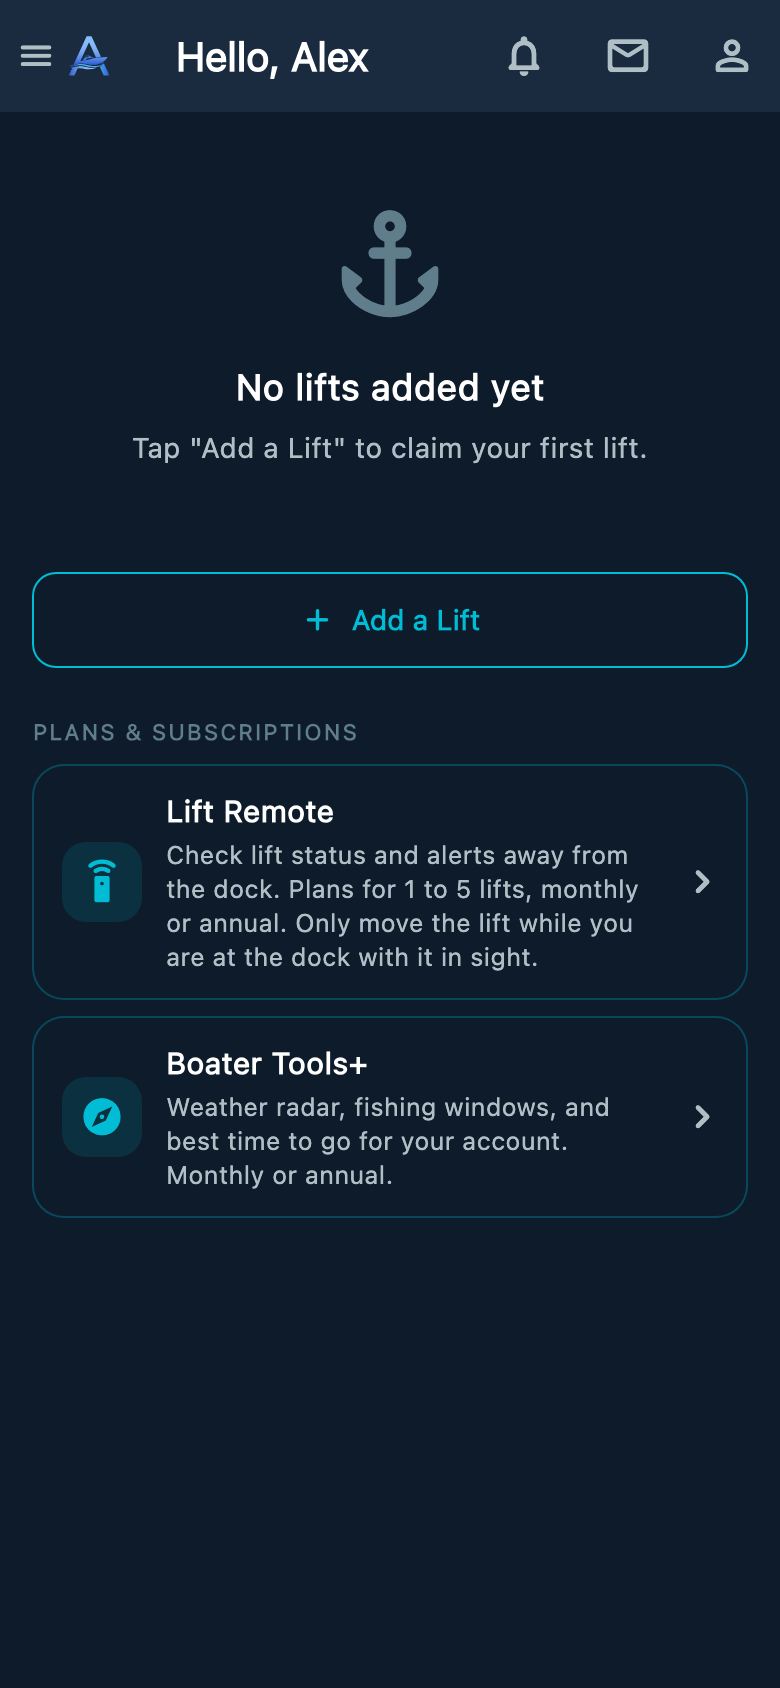
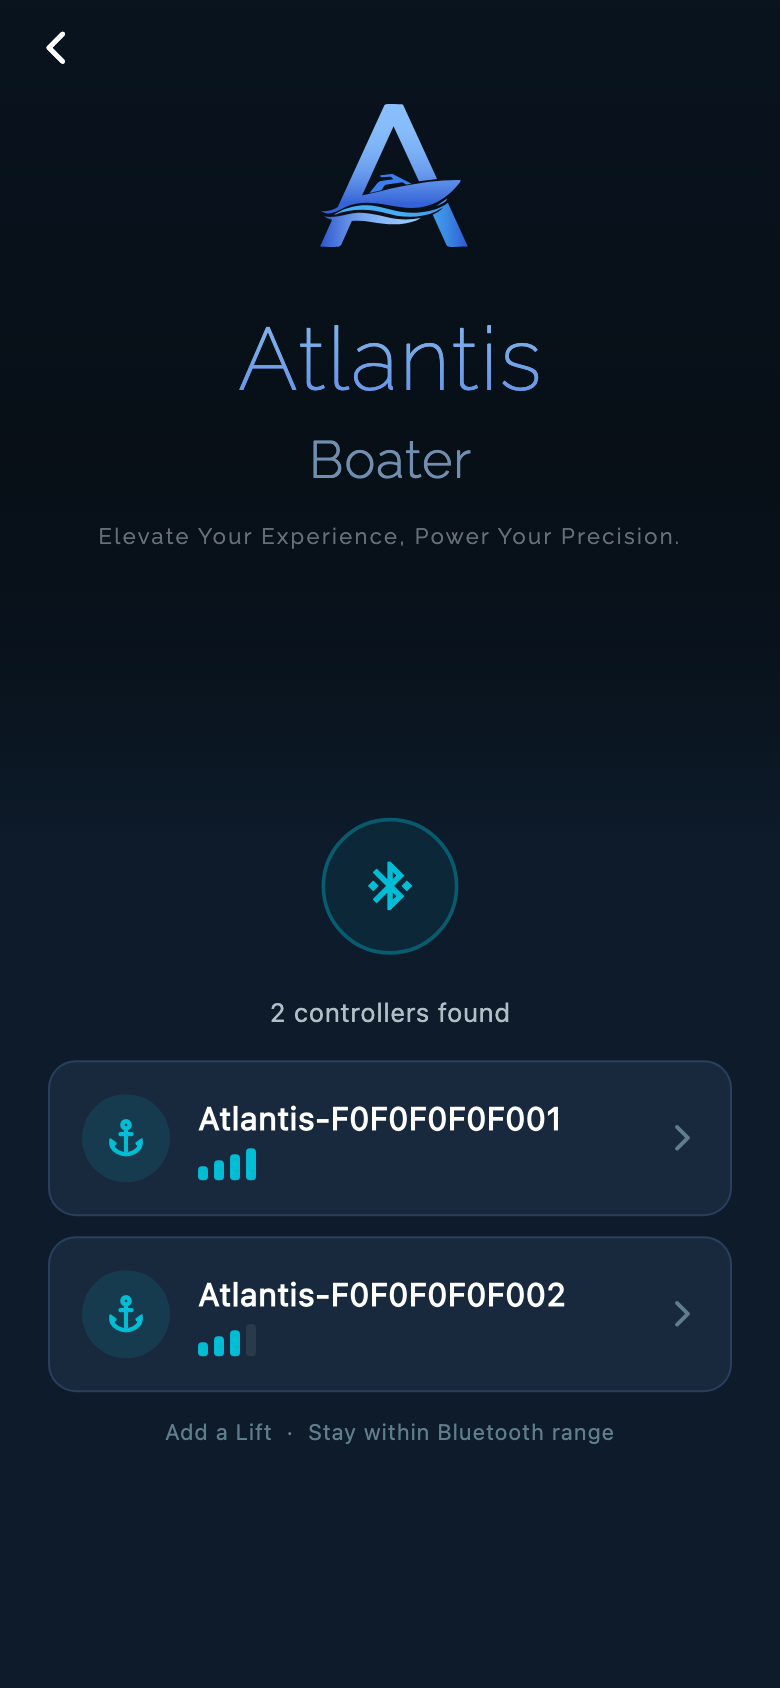
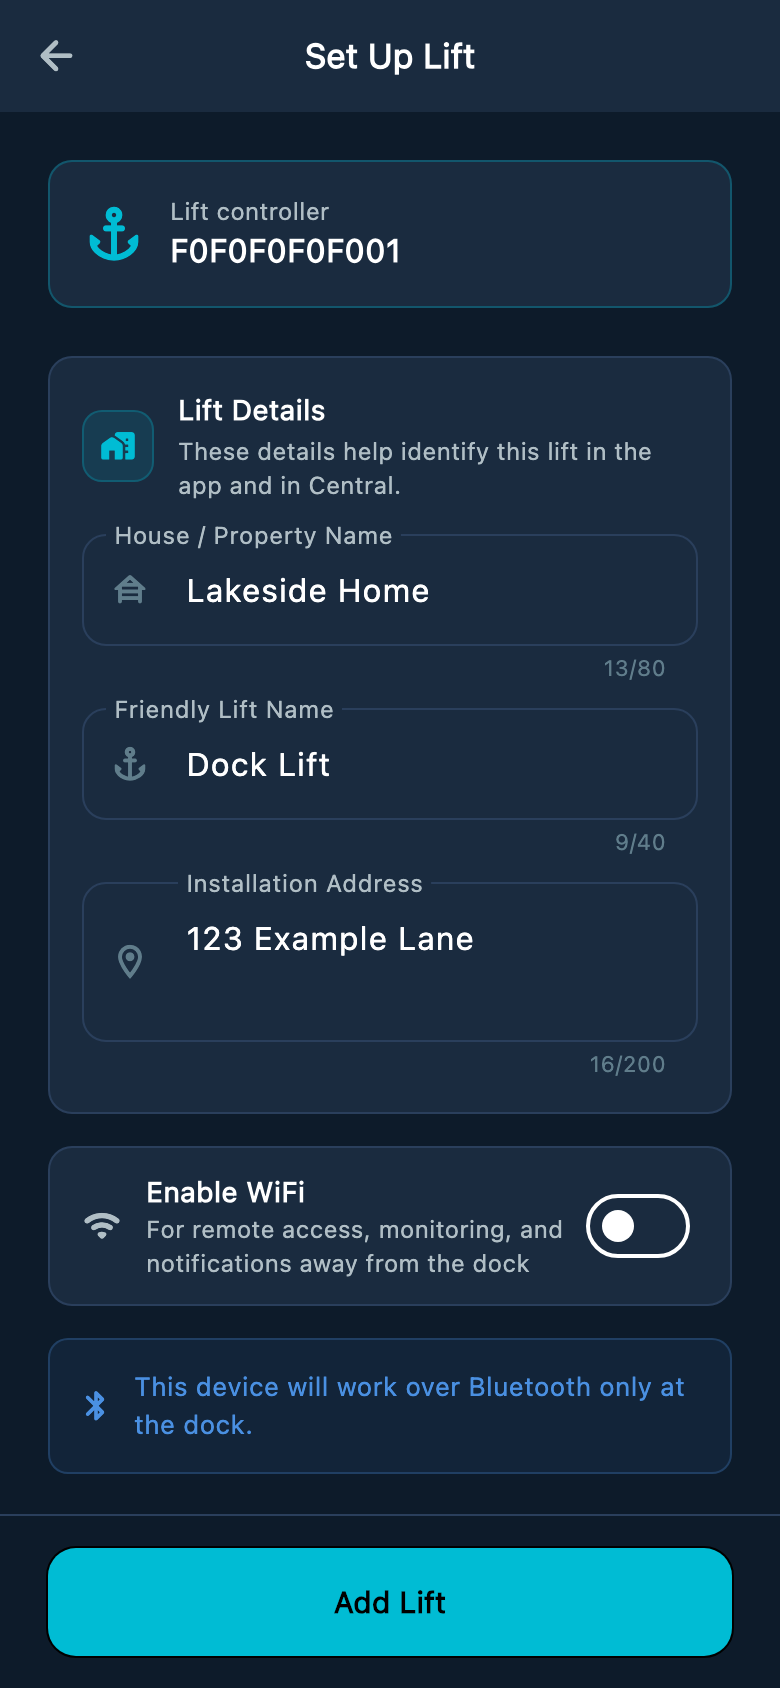
Select an image to enlarge it.
If setup is interrupted, return on the same phone and choose Resume setup when it appears in your lift list. Stay near the controller and follow the message in the app. Keep the app and its saved data until setup finishes.
Bluetooth lets you control the lift while you are nearby. Online features, such as remote access, alerts, and updates, need an internet connection. Keep the lift in sight whenever it moves, whichever connection you use.
Before selling or transferring a lift that has only used Bluetooth, connect it to Wi-Fi and let it come online. Removing it from your app alone does not complete an ownership transfer. Contact Atlantis Support if it cannot come online. To add Wi-Fi, stand near the lift, open it in the app, tap the gear icon (Lift & Device Info), scroll to WiFi, and choose Update WiFi Settings. That screen works over Bluetooth only, so it will not open from away from the dock.
If the lift belongs to a previous owner or is already claimed, ask the owner or Atlantis Support to help with the account handoff. Do not reset it to get around an ownership message.
Nearby Bluetooth control does not require a remote-access subscription. Remote access needs Wi-Fi internet and an active plan or access provided by your marina. Wi-Fi and connection help
03 · Use your lift
How to use your lift
Have your installer finish setup, test the lift, and show you its controls before your first use. Make sure the lift has power and, if it has an operating key, turn the key ON. Keep the installer's stopping and safety settings unchanged.
Keep the lift in sight whenever it moves
- Stay at the dock, keep people clear, and remain at the controls.
- With AUTO off, hold UP or DOWN to move and release to stop.
- With AUTO on, releasing the button does not stop travel. Press STOP in Atlantis Boater or any button on the paired wireless remote. The switch instructions below explain how to stop at the control box.
- Use only the controls and positions your installer demonstrated. Stop if movement is unexpected or a warning appears.
Check AUTO while the lift is stopped. The normal ready light is solid blue with AUTO off and solid green with AUTO on. Use only the mode your installer has demonstrated. Check other lights and sounds.
Using the wireless remote
Use the remote your installer paired with this lift. Stand where you can see the whole lift and keep the remote in your hand.
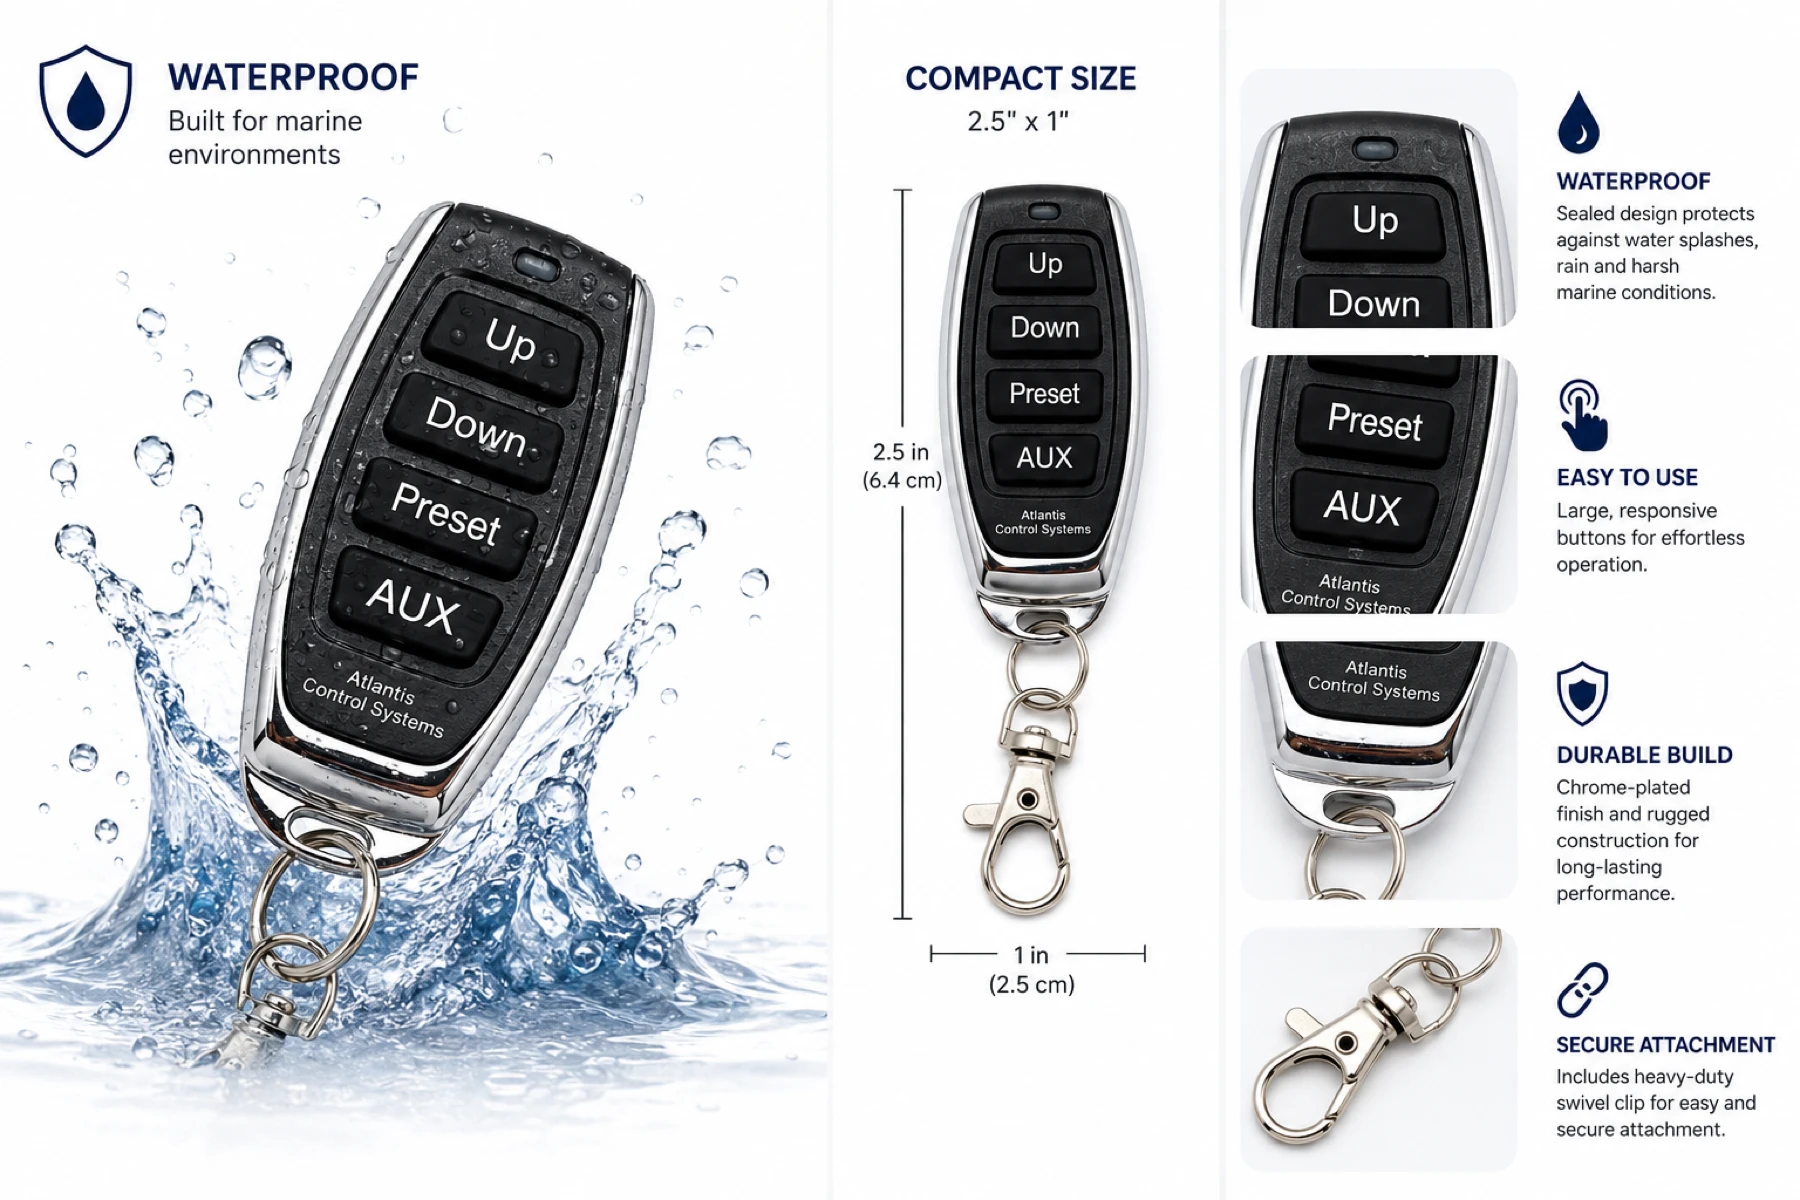 Enlarge remote image
- Raise or lower: UP raises the lift; DOWN lowers it.
- With AUTO off: hold UP or DOWN to move. Release the button to stop at the height your installer showed you.
- With AUTO on: press and release UP or DOWN. The lift continues to its tested upper or lower stop.
- Stop automatic travel: press any button on the paired remote. Release it and wait for the lift to stop before making another request.
The standard remote does not change AUTO. Use the fitted AUTO switch or keypad button, or the AUTO control in Atlantis Boater, while the lift is stopped.
PRESET needs an Atlantis Position Sensor (APS) and a saved, tested height. With AUTO on, tap PRESET once for preset 1 or twice quickly for preset 2. With AUTO off, hold PRESET to move toward preset 1 and release to stop. Only use presets your installer has demonstrated.
If accessories are connected, use AUX while the lift is stopped: tap once for AUX1 or twice quickly for AUX2. Ask your installer which accessories those buttons operate.
Using the control switches
Use the everyday UP/DOWN controls on the outside of the control box, or the wired controls your installer showed you. Keep the enclosure closed.
- With AUTO off: hold UP to raise or DOWN to lower. Release the control to stop.
- With AUTO on: press and release UP or DOWN to travel to the tested upper or lower stop. Releasing the control does not stop this move.
- Stop automatic travel: after releasing the control, press either UP or DOWN again. This press stops the lift, including an automatic move started from the app or remote.
- Change direction: release the controls, wait until the lift has stopped, then make a new UP or DOWN request.
Using the Atlantis Boater app
- Open the right lift: select your lift and choose Open Lift Control. Check its name and read any warning before moving.
- With AUTO off: touch and hold UP or DOWN. Lift your finger to stop. A lift with no travel limits has no AUTO control and uses this held movement.
- With AUTO on: tap UP or DOWN to travel to the tested upper or lower stop. The lift keeps moving after you lift your finger.
- Stop: tap the app's STOP button to cancel movement or a pending direction change.
On a fully set-up APS lift, choosing Go for a saved preset or tapping a height on the position bar starts automatic travel and can turn AUTO on. Use only tested positions and tap STOP to stop early.
Example screens from Atlantis Boater. Names, device details, and settings are samples.
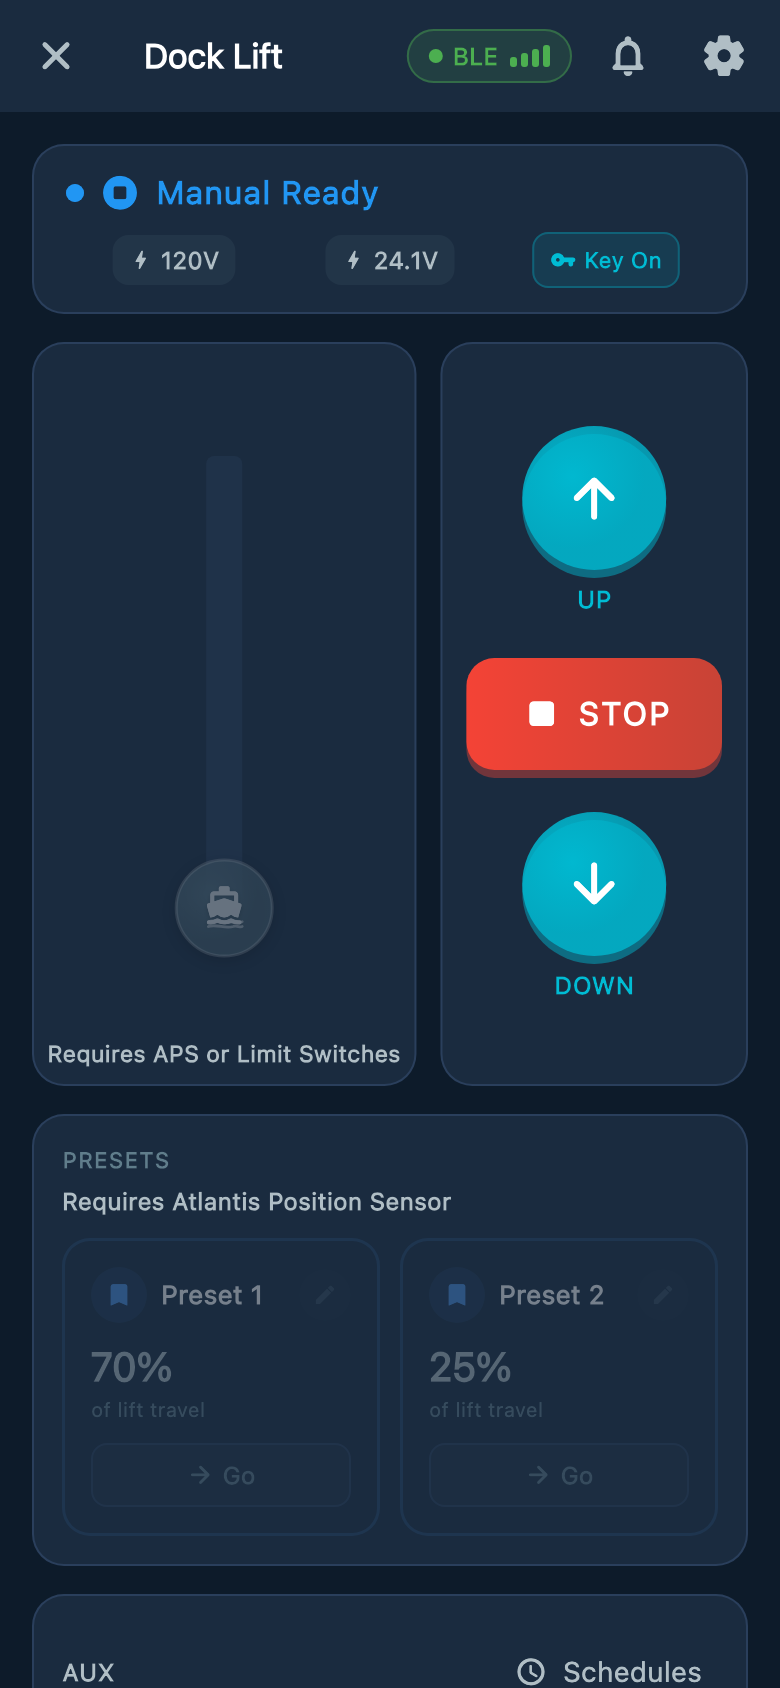
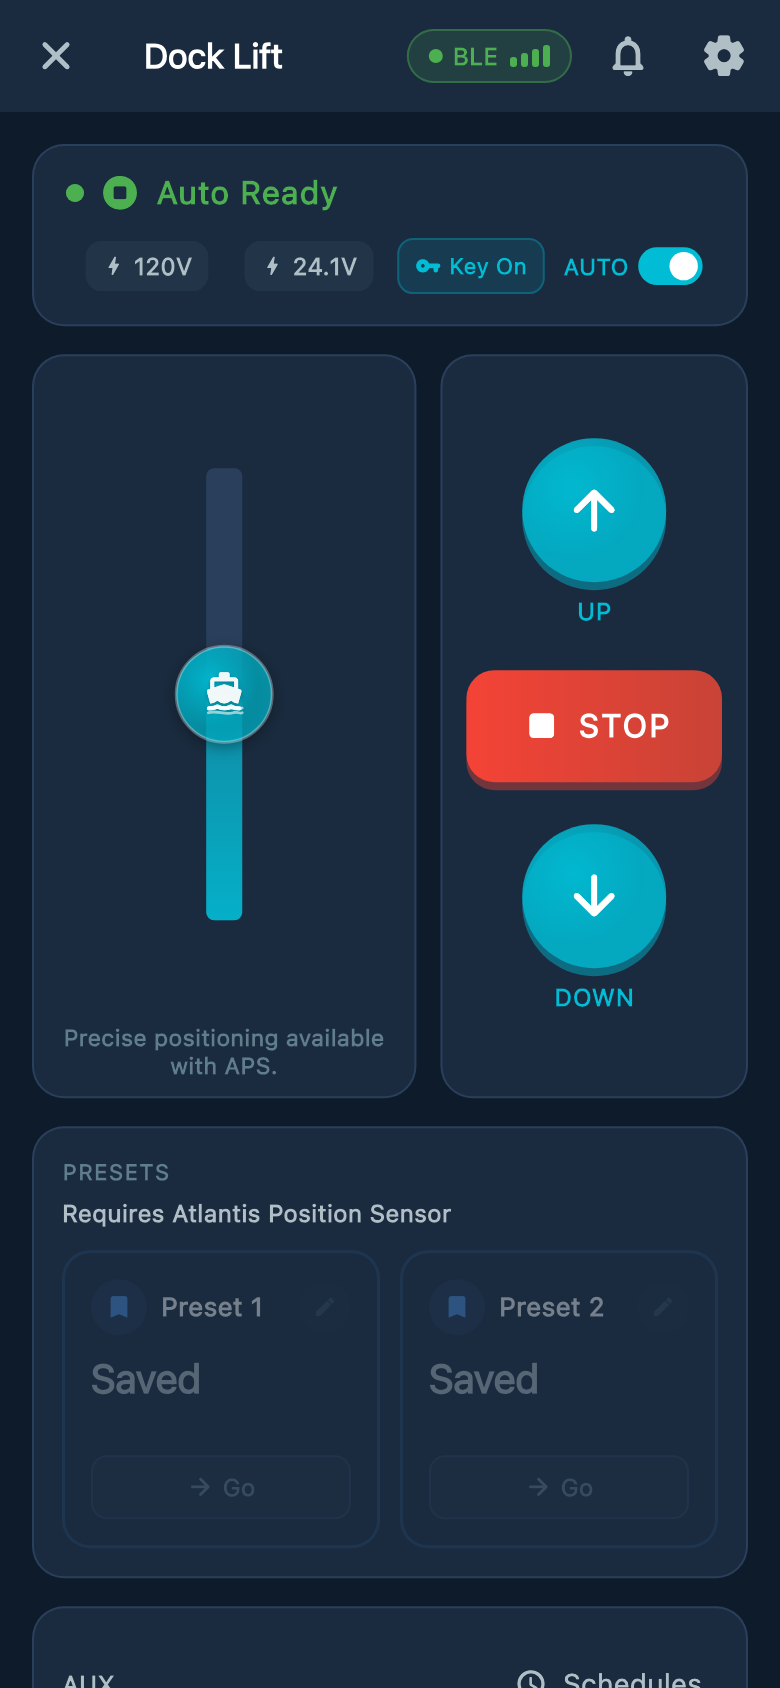
Select an image to enlarge it.
Know where your lift will stop
- No limits: you must release UP or DOWN before the lift goes too far. There is no automatic top or bottom stop. The backup timer does not know the lift's height.
- Physical limit switches: working upper and lower switches stop travel at the installed endpoints. Saved heights need APS.
- Atlantis Position Sensor (APS): completed setup provides saved upper and lower stops, a position reading, and saved heights.
Stay at the controls until movement has finished. If UP lowers the lift, DOWN raises it, or anything moves unexpectedly, stop and contact your installer. When you are finished, turn the operating key OFF if fitted and store the remote securely.
See the app controls for your lift setupNeed help with your lift?
Contact Atlantis Support with the lift serial number, the email you use for Atlantis Boater, and the exact app message. For a marina assignment, contact your marina first. Never send passwords.
Contact Atlantis SupportInstallation and service
Installing a lift or changing its configuration?
Use the dedicated X4.4 guide for initial installation, control settings, stopping-system setup, and testing. Follow its qualifications and electrical safety requirements.
Open the X4.4 Installation & Configuration GuideWas this article helpful?
Tell us whether this answered your question.